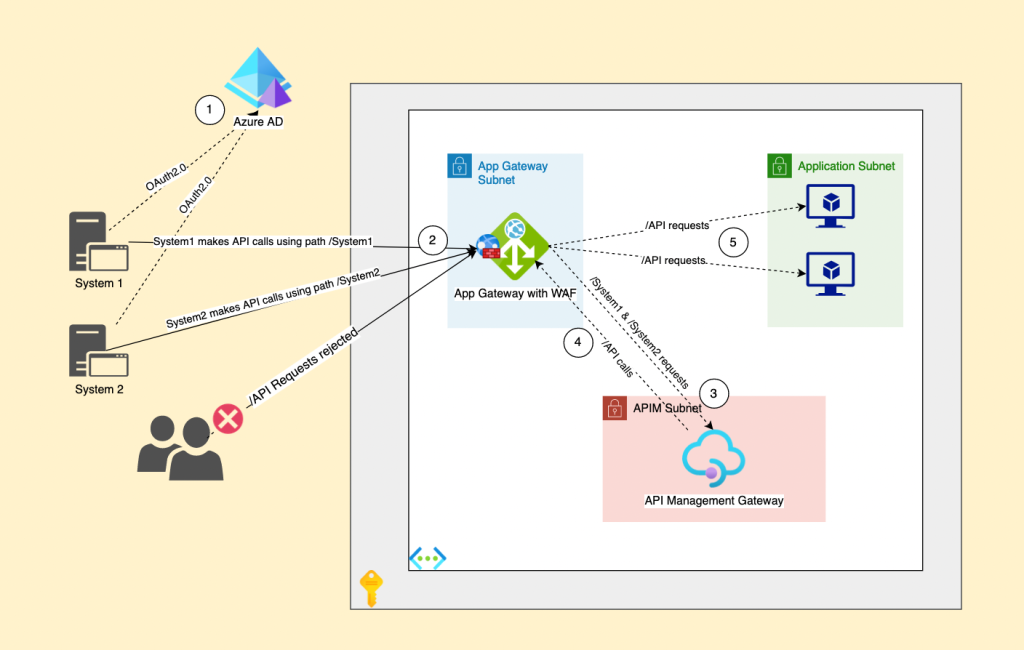
One of my clients requested to secure the APIs of one of his newly purchased applications using Azure API Management Gateway. Until then everything seems straight forward until he explained more about the current environment.
Environment Description
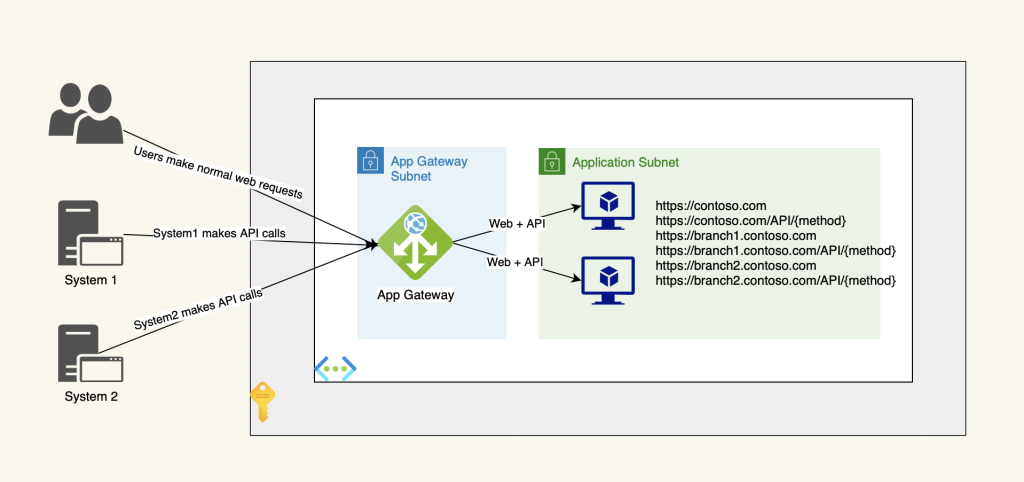
- The environment consists of two backend servers behind an Azure App Gateway with WAF v2 enabled and there is no multi-tiering between the web and app services.
- The application consists of multiple websites, a root website and branches for multi-tenancy. (for example the root website is contoso.com and branches are branch1.contoso.com, branch2.contoso.com, etc.)
- There is no separate endpoints for the APIs rather the root domain and branches share the same DNS names with the related APIs. (for example the API URI for the root website is https://contoso.com/API/{method} and the API URI for Branch1 is https://branch1.contoso.com/API/{method} and so on for all branches).
- The APIs are consumed by external services so blocking access to the APIs from outside is not possible.
- Each external subscriber connects to the APIs of a specific branch only (for example: system1 will connect to branch1 APIs and system2 will connect to branch2 APIs while the root APIs will not be used).
- Each branch has its own scope of APIs, while the root domain provides full access to all branches.
The Problem
- The application is not fully multi-tiered, the web, backend and the APIs services run on the same servers.
- There is no separate endpoints for the APIs rather the root domain and branches share the same DNS names with the related APIs. (for example the API URI for the root website is https://contoso.com/API/{method} and the API URI for Branch1 is https://branch1.contoso.com/API/{method} and so on for all branches).
- The application uses basic authentication to secure the APIs which is very weak and prone to many cyber-attacks.
The Solution
To protect the APIs we had to deploy an Azure API Management Gateway behind the App Gateway following the next steps:
- Prepare the infrastructure requirements for the APIM deployment in Internal mode.
- Route all API requests to the APIM first for validation before sending them to the backend servers.
- Add another layer of authentication (OAuth2.0) to protect the API requests.
- Replace the /API path with a system specific path. (for example branch1 APIs path will change from https://branch1.contoso.com/API/{method} to https://branch1.contoso.com/branch1/{method} and so on with other branches).
- Disable any request sent to /API/* URI on the App Gateway except those coming from the APIM.
- Create required APIM policies if needed.
Deployment Steps
- Deploy an Azure API Management service inside the Virtual Network with the Type Internal to put it behind the App Gateway following what is mentioned in the article below:
- In the App Gateway add a new backend pool and add the APIM FQDN in the target. (The FQDN should be {APIM Name}.azure-api.net).
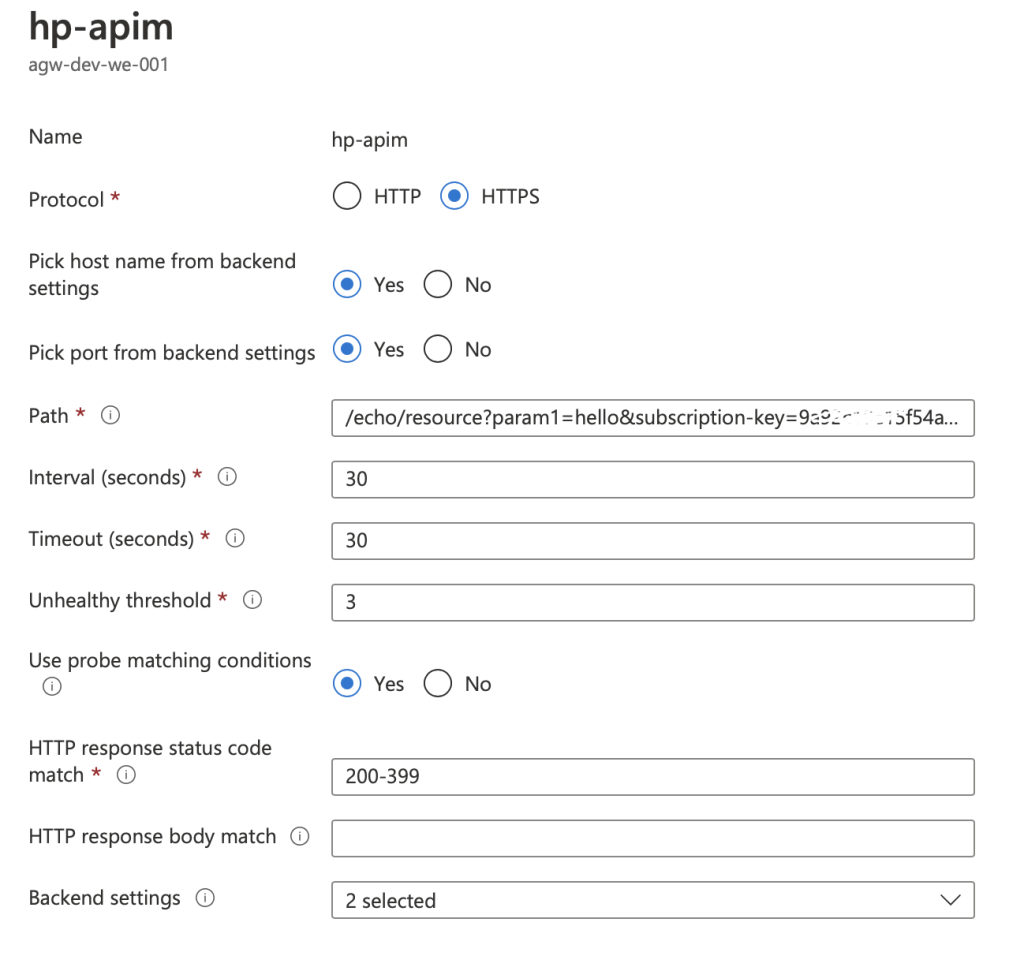
- Create a new health probe to connect to the default Echo API in the APIM. (use similar settings as shown in the picture below).
- Add a new backend settings for each branch that will be consumed in the App Gateway.
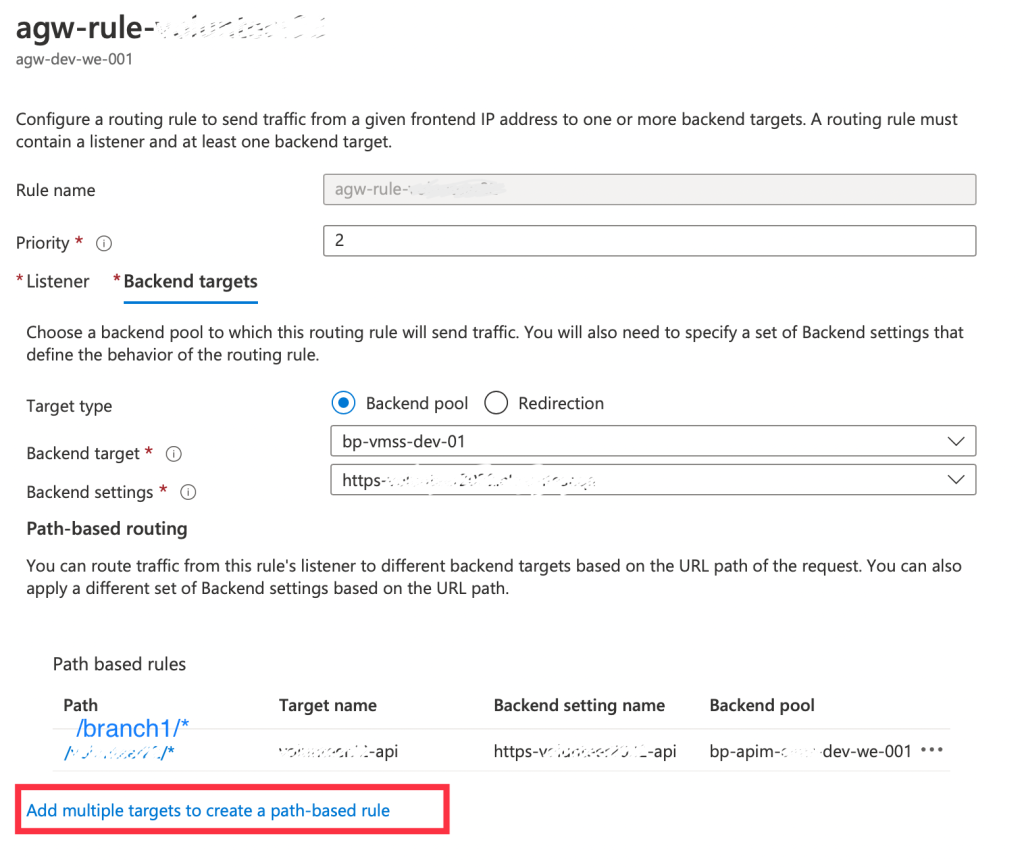
- Delete the basic rule created for the branches and create a new one and keep the old backend target and settings in the rule then click on Add multiple targets to create a path-based rule and make the path /branch1/* and add the new backend settings and target.

- Now we need to create the APIs in the APIM, luckily the application uses Swagger tools so we were able to export the API definitions and import it in APIM and make sure to add API URI Suffix for each branch. (a sample definition can be found here).
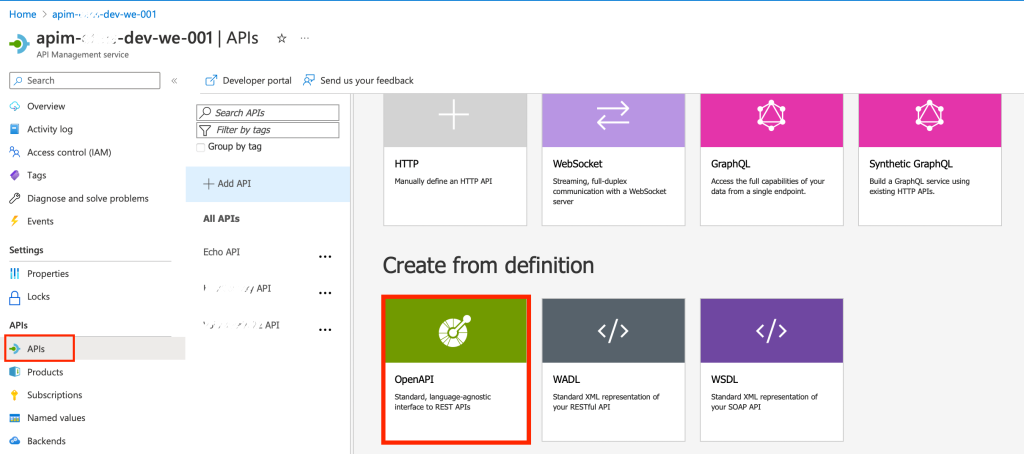
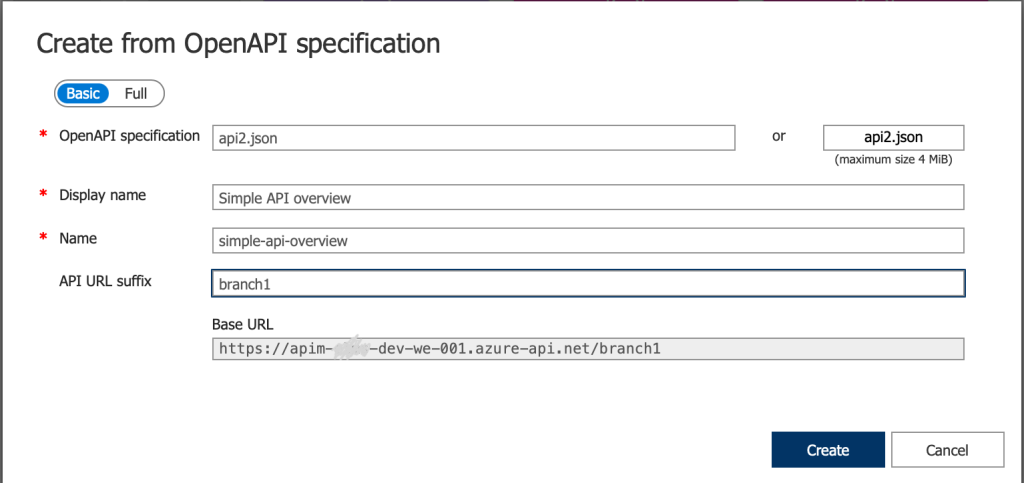
- Open the newly created API then remove any unwanted methods.
- Click on the pencil icon next to HTTP(s) endpoint then add the backend URL of the branch in the Service URL then select Basic and add the API Key username and password then click Save.
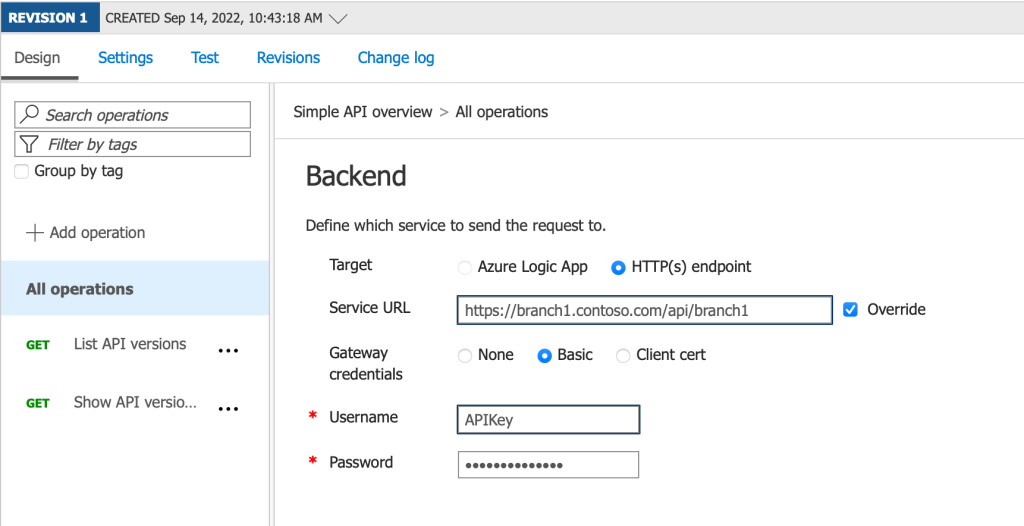
- Now we need to create a new Product for each API subscriber. (make sure to limit the subscription count to 1 if only one subscriber will use the API then select the relevant API to be included in this product).
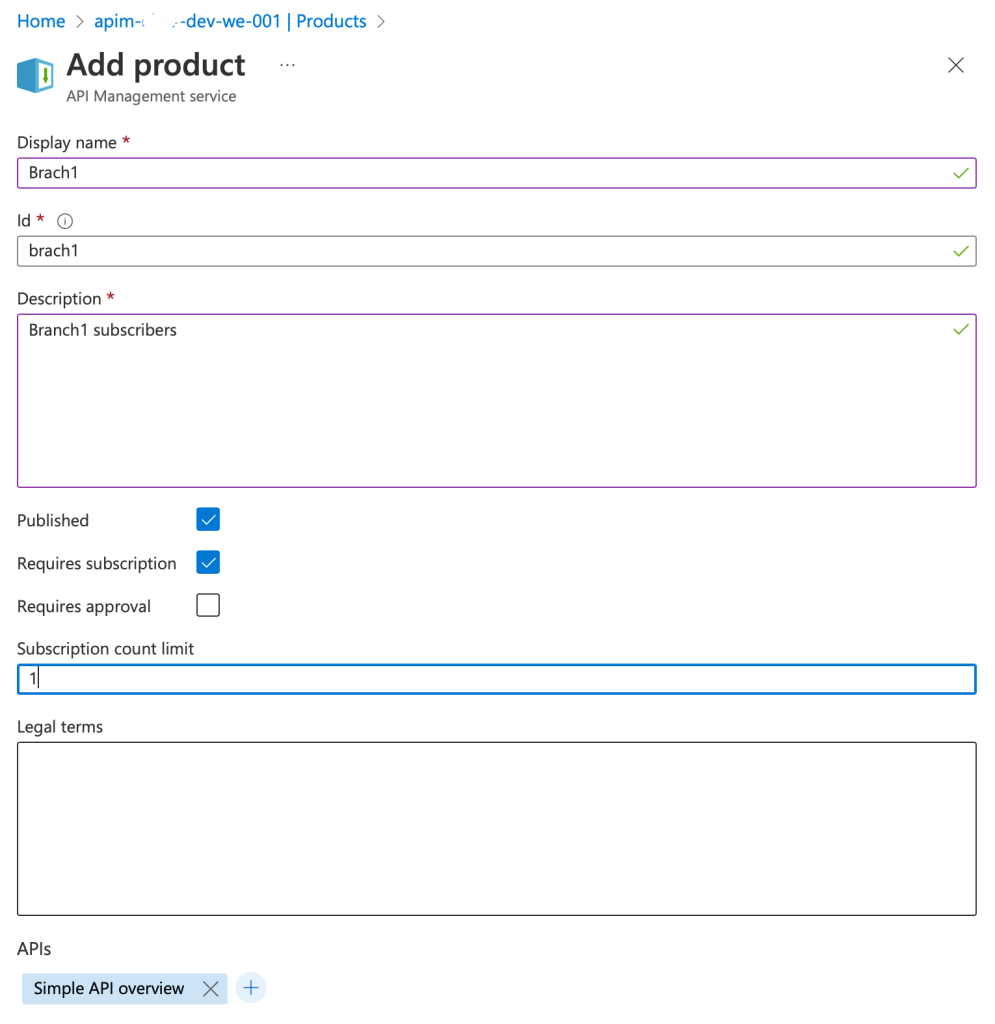
- Now click on the newly created product then go to subscriptions and click on the ellipses on the right and chose show/hide keys then record the value of the primary key.
OAuth2.0 Authentication
Now we need to enable the OAuth authentication with the API, we will follow the below article from Microsoft Community to create the required Azure AD Apps and configure the authentication using Client Credentials flow.
Once OAuth2.0 is enabled then we can block access to /API from Azure WAF except from the public IP of the APIM.
- Go to the APIM overview page then under the Virtual IP (VIP) addresses record the public IP
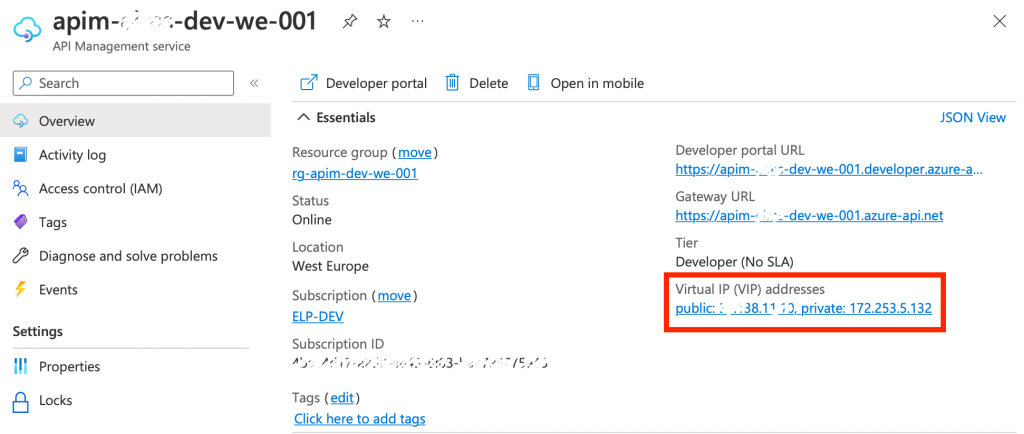
- Now open the WAF Policy connected to the Application Gateway then go to Custom rules, add a new custom rule, call it BlockAPI, give it priority, under conditions add condition as shown below

- This way we blocked any public traffic going to the application using the path https://hostname.contoso.com/API except from the APIM.
- The API traffic going to branch1 for example will need to use the path https://branch1.contoso.com/branch1/{method} however they will need to acquire an OAuth2.0 Token first using the Client Credentials flow as stated above in addition the subscription key needs to be passed as a header with each request.
- Now you can apply policies if required and this is another topic to be discussed in another blog post soon.